How to build your own blog?
(Blogdown + Netlify + Github + NameSilo)
Every one should BLOG!
1. Build local website
To make a blog website, first we need to build a local website. Traditionally, it needs many codings on html and css files. Now thanks to Yihui’s contribution to R community, we can build our own blog very easily by using blogdown.
Here is a quick example.
1.1 Prepare tools

1.2 Build blog website.
- Create a new prject by using hugo template
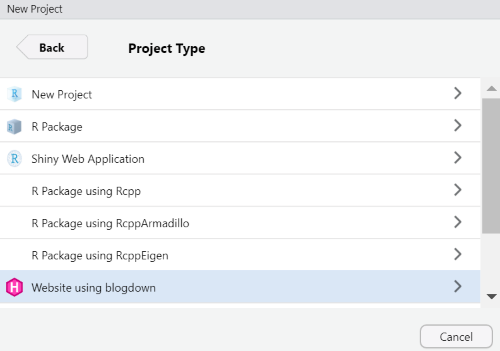
You can look for the theme at HUGO. All you need is replace yihui/hugo-lithium with the Github Repository address of he the theme you have choosen. For example, if you like the theme from “github.com/abc/edf”, just change yihui/hugo-lithium with abc/edf.
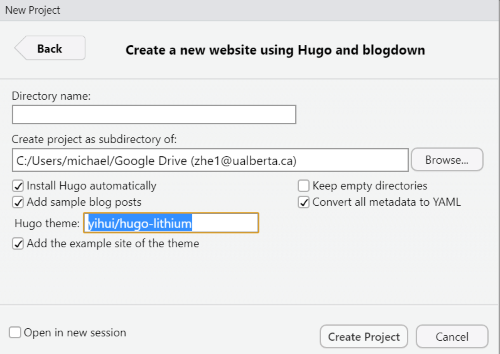
- Build local website by commend blogdown:::serve_site()
After that you will find a new folder public.
This is your local website.
YES, easy peasy lemon squeezy! Next is publish it online.
2. Publish by using Netlify
Netlify is recommended by Yihui. And it is indeed user friendly.
Here is the steps:
2.1 Of course Sign up at netlify.com.
2.2 Drag your local website to the box
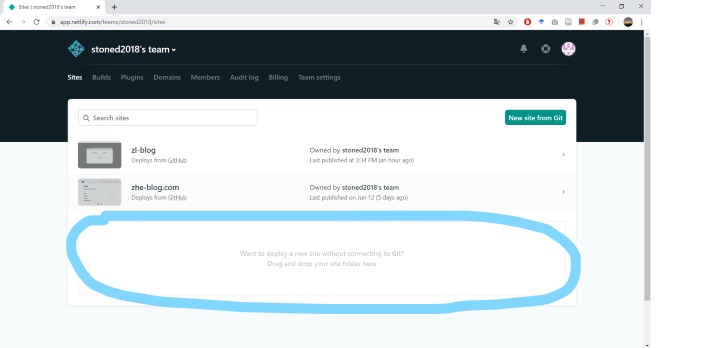
Done! But this is a little ugly. Because firstly you need always backup your local website incase they lost or broken. And secondly to update your blog, you need to drag the whole folder into netlify everytime.

Don’t worry, Github is coming to help.
3. Setup Github
3.1 Sign up a Github account
3.2 Create a Repo for your blog
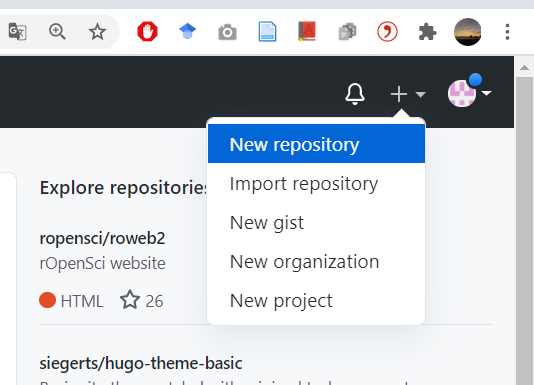
3.3 Connect your local website to the Github Repo
Recommend use Github desktop — Make life easier.
step 1: Clone the repository

step 2: Copy the local website folder to the repo folder you just created
step 3: Commit & Fetch
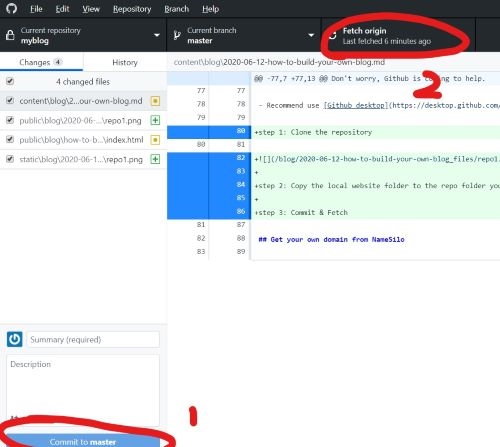
Now your website is gited to Github. Next is Connect Netlify and Github.
Step 4: Linked to Netlify
This is a three buttons’ thing.
- Button 1 (start)

- Button 2 (from Github)
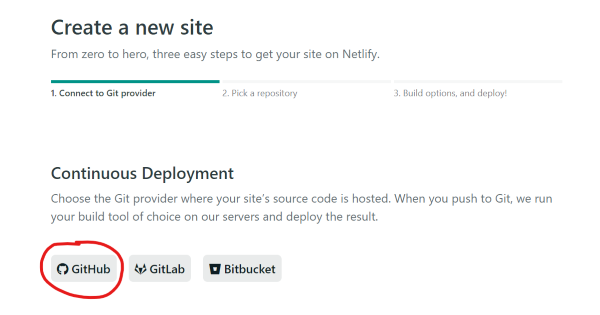
- Button 3 (Choose Repo)
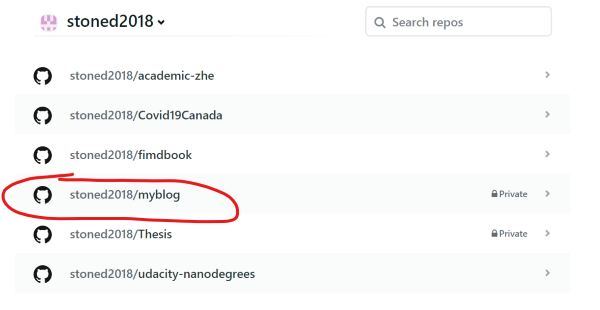
DA DA, Done!
What’s next: Get your own domain.
At this far, you may not satisfied with the name netlify assigned to you.
You have two choices: Change the name before (netlify.app); or add your own domain.
I prefer the later, because many reasons… IT LOOKS GOOD :)
namesilo provides nice price and service.
After you get your own domain, you need to add it to netlify and link the domain to Netlify.
Just follow the hints in netlify or get help form netlify docs